Account Settings
Manage your Pieces account settings, authentication, linked accounts, organizations, subscriptions, personal cloud synchronization, and privacy settings. Your account information is automatically synced from the third-party service you used to sign in, ensuring your profile stays up to date.
To access Account settings, click your User Profile in the top left, then hover over Settings and select Account.
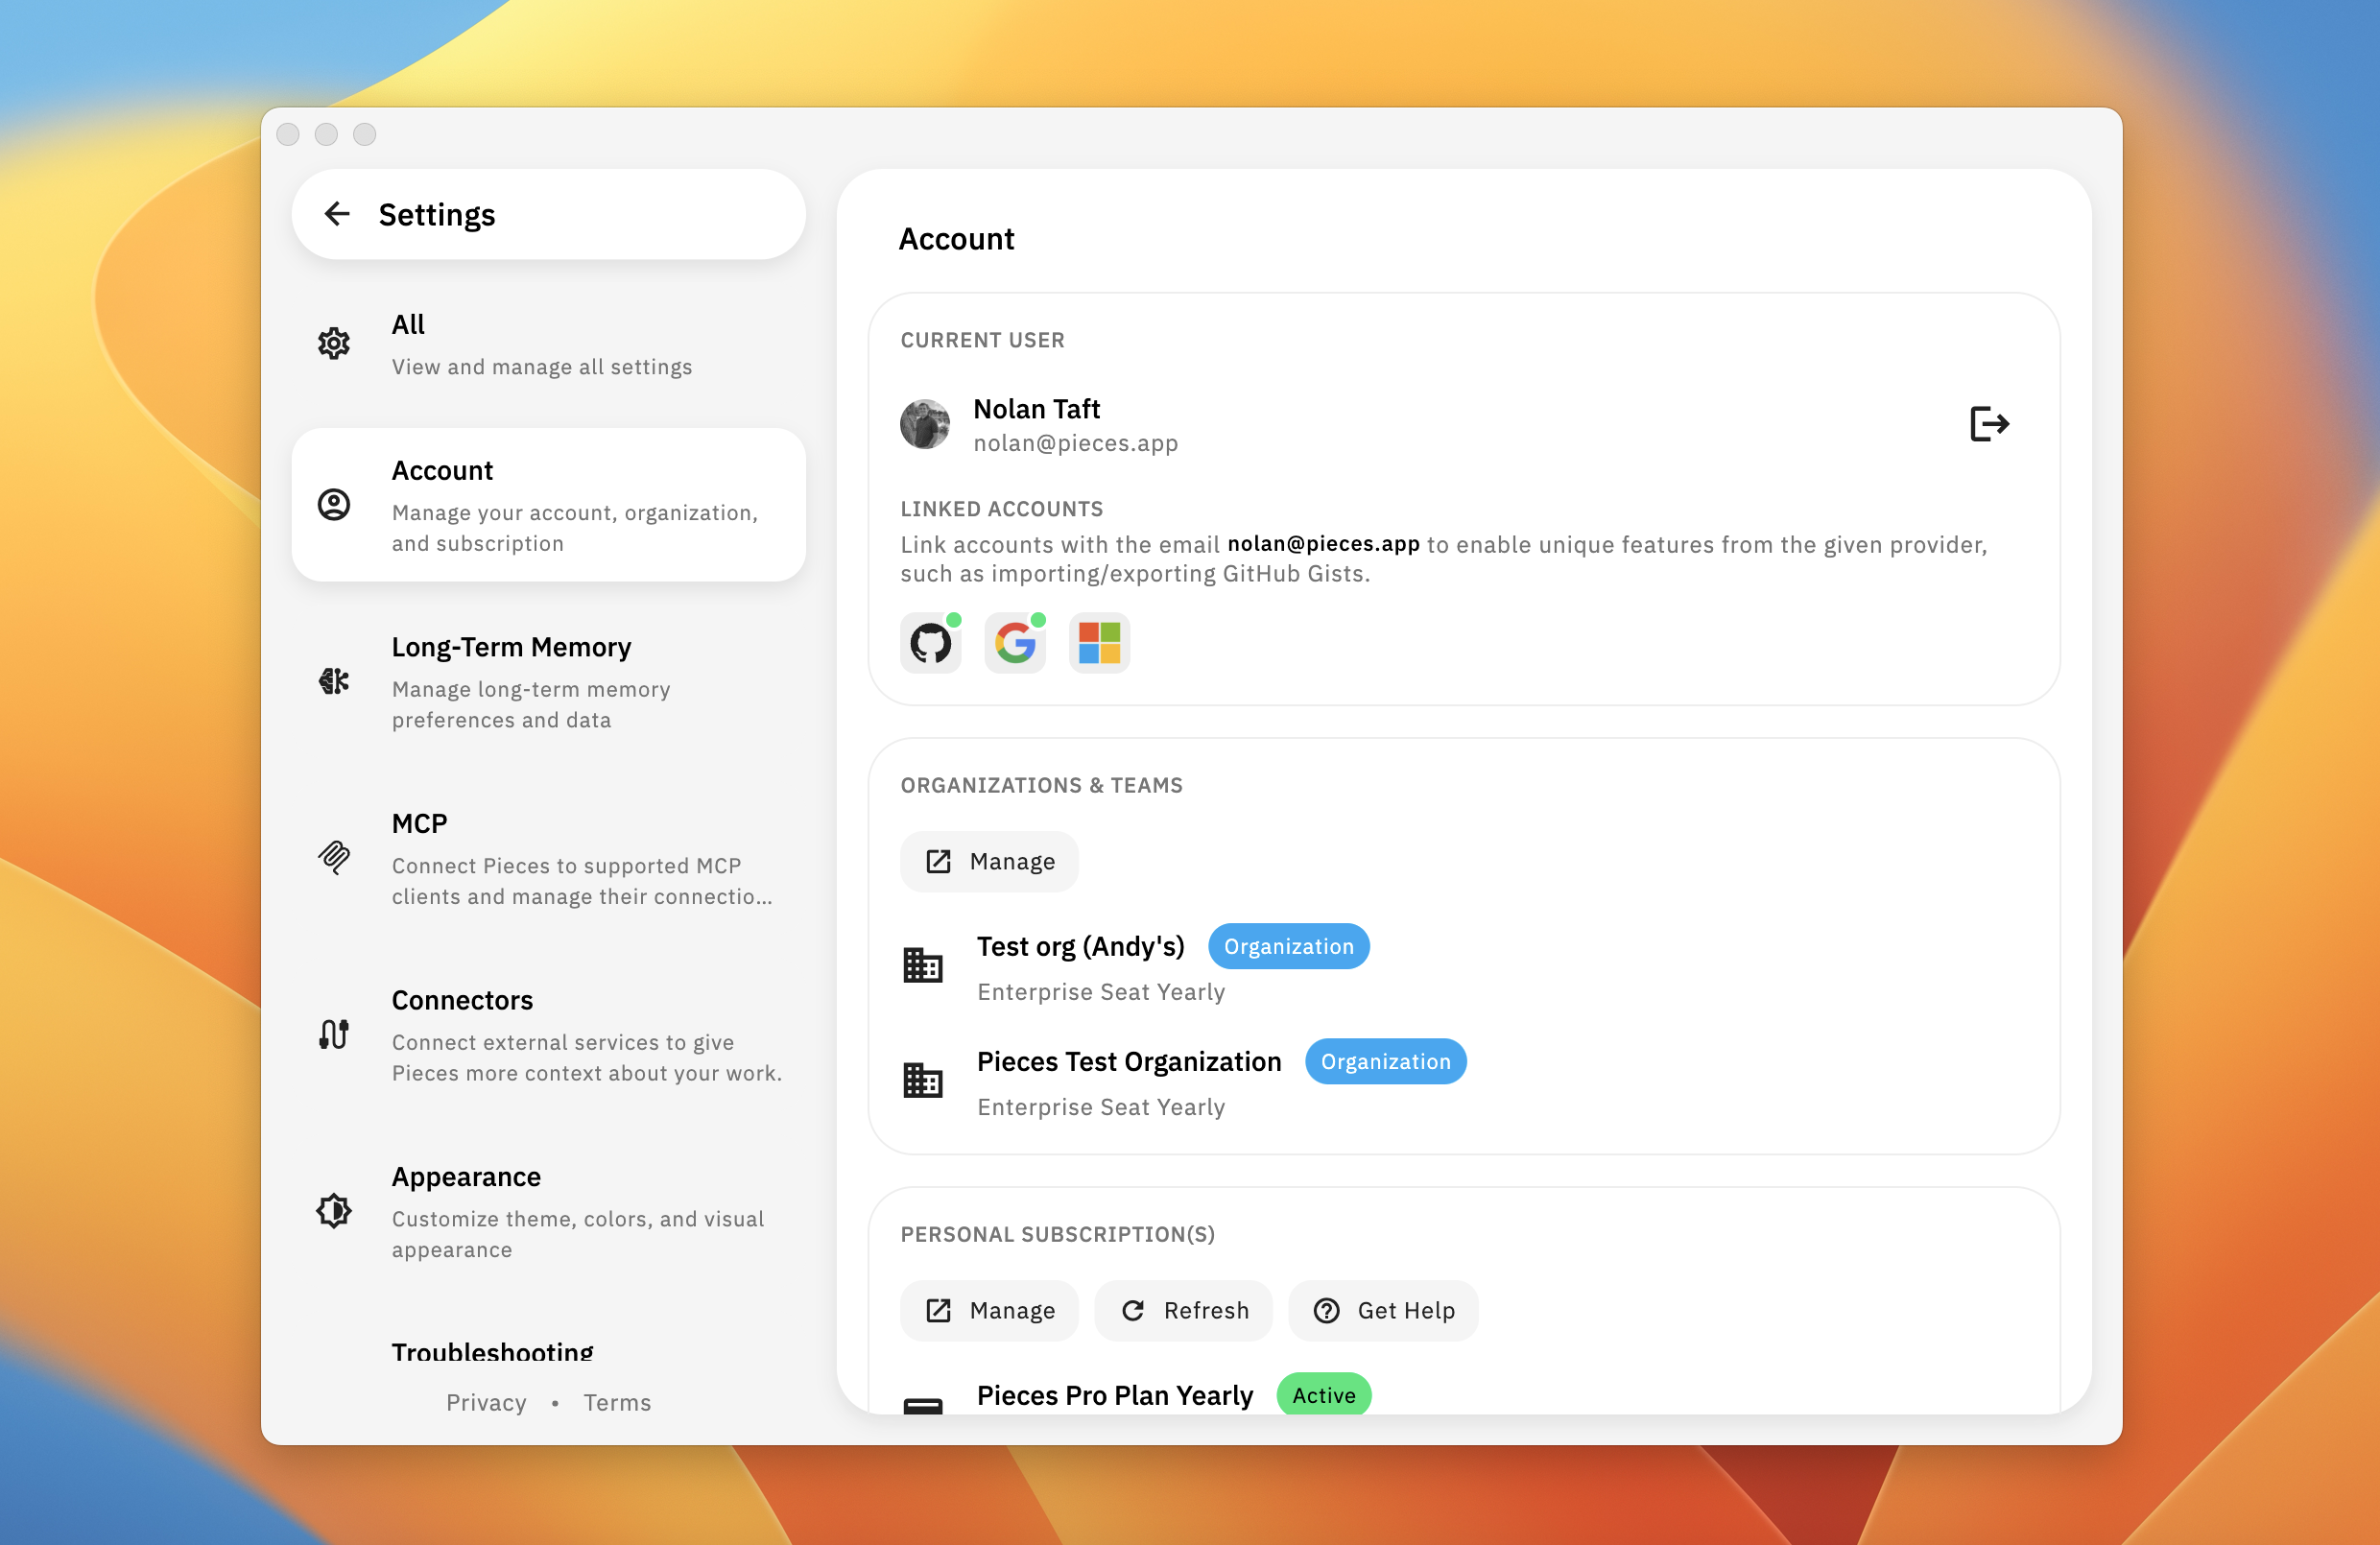
Account settings showing profile information, linked accounts, organizations, and subscriptions
Account Information
View your account details and manage your session. Your name and email are pulled from the third-party service you used to authenticate, ensuring your profile information stays synchronized.
Viewing Your Account Information
Your account information displays your name and email address at the top of the Account settings page.
Clicking on your name opens the Accounts & Cloud Integrations modal, where you can manage linked accounts and account settings.
Click your `User Profile` in the top left, then hover over `Settings` and select `Account`.
At the top of the Account settings page, you'll see your name and email address. This information is automatically synced from the service you used to sign in (GitHub, Google, or Microsoft).
Click on your `Name` in the *Account* section to open the *Accounts & Cloud Integrations* modal, which provides detailed account management options.
Logging Out
Sign out of your Pieces account to end your current session. You can log back in using any of your linked accounts. You can sign out from multiple locations.
Signing Out from Settings Hover Menu
Click your `User Profile` in the top left of the home view.
In the dropdown menu that appears, click `Log Out` to sign out of your account.
You'll be signed out and returned to the login screen. You can sign back in using any of your linked accounts.
Signing Out from Account Settings
Click your `User Profile` in the top left, then hover over `Settings` and select `Account`.
Click the `logout icon` (arrow pointing out of a square) next to your name and email to sign out of your account.
You'll be signed out and returned to the login screen. You can sign back in using any of your linked accounts.
Signing Out from Accounts & Cloud Integrations Modal
You can also sign out from the Accounts & Cloud Integrations modal. Open the modal by clicking your Name in the Account section, then scroll down to the Danger Zone section and click Sign Out to sign out of your account.
You will no longer have the ability to generate shareable links or share via GitHub Gist after signing out.
Linked Accounts
Link accounts with the same email address to enable unique features from each provider, such as importing and exporting GitHub Gists. Your profile information (name, email, avatar) is automatically pulled from these linked accounts, making it easy to sign in and keep your information up to date.
Understanding Linked Accounts
Accounts are linked when you sign in using a third-party service (GitHub, Google, or Microsoft). You can link multiple accounts that use the same email address to access features from each provider. Accounts cannot be manually edited—this ensures your account stays secure and synced with the services you use to authenticate.
Viewing Linked Accounts
See which third-party services are connected to your Pieces account. You can view linked accounts either from the Account settings page.
Click your `User Profile` in the top left, then hover over `Settings` and select `Account`.
Scroll down to the *Linked Accounts* section, which displays icons for GitHub, Google, and Microsoft. Connected services will have a green dot on them. Services that aren't linked will not.
For detailed account management, click on your `Name` in the *Account* section to open the *Accounts & Cloud Integrations* modal. In the *Connect Individual Accounts* section, you'll see:
* Connected services show "Connected to [Service]" with a green checkmark
* Unconnected services show "Connect to [Service]" without a checkmark
Opening Accounts & Cloud Integrations Modal
Access the Accounts & Cloud Integrations modal to manage your linked accounts, view connection status, and access account features.
Click your `User Profile` in the top left, then hover over `Settings` and select `Account`.
Click on your `Name` in the *Account* section at the top of the page to open the *Accounts & Cloud Integrations* modal.
The modal displays:
* **Introduction**: Information about connecting accounts to enable features like importing/exporting GitHub Gists and generating shareable links
* **Important Note**: Only accounts with a matching primary email address will be linked
* **Connect Individual Accounts**: List of available services (Microsoft, GitHub, Google) with connection status
* **Support**: Links to Discord support and feedback resources
* *Danger Zone*: Option to sign out of your account
Linking an Account
Connect a new third-party service to your Pieces account to access provider-specific features like importing and exporting GitHub Gists.
Click your `User Profile` in the top left, hover over `Settings`, select `Account`, then click on your `Name` to open the *Accounts & Cloud Integrations* modal.
In the *Connect Individual Accounts* section, find the service you want to link (Microsoft, GitHub, or Google).
Click on the service name (e.g., "Connect to Microsoft") to start the connection process.
<Callout type="info">
Make sure the account uses the same email address as your Pieces account. Only accounts with a matching primary email address will be linked. Otherwise, a new, separate account will be created.
</Callout>
Follow the authentication flow for the selected service. Once authenticated, the account will be linked and you'll see a green checkmark next to the service name.
Disconnecting an Account
Remove a linked account from your Pieces account. You can disconnect accounts from the Accounts & Cloud Integrations modal.
Click your `User Profile` in the top left, hover over `Settings`, select `Account`, then click on your `Name` to open the *Accounts & Cloud Integrations* modal.
In the *Connect Individual Accounts* section, find the service you want to disconnect. Connected services show "Connected to [Service]" with a green checkmark.
Click on the connected service to disconnect it. Confirm the disconnection when prompted.
The service will no longer show a green checkmark, indicating it has been disconnected. You'll lose access to provider-specific features for that service.
Organizations & Teams
View and manage your organization memberships from the Account settings page. The Organizations & Teams section displays all organizations you belong to, along with their subscription types and management options.

Account settings page showing Organizations & Teams section with organization list and management options
Viewing Your Organizations
See all organizations you're a member of, including their subscription plans.
Click your `User Profile` in the top left, then hover over `Settings` and select `Account`.
Scroll down to the *Organizations & Teams* section to view your organization memberships.
Each organization displays:
* **Organization name**: The name of the organization
* **Organization label**: A blue badge indicating it's an organization
* **Subscription type**: The plan type (e.g., Enterprise Seat Yearly, Enterprise Seat Quarterly, Enterprise Seat Monthly)
Managing Organizations
Access organization management features from the Account settings page.
Click your `User Profile` in the top left, then hover over `Settings` and select `Account`.
Scroll down to the *Organizations & Teams* section.
Click the `Manage` button (external link icon) to open your account page in the browser, where you can view and manage your organizations, invite members, configure settings, and access billing information.
Refreshing Organizations
Manually refresh your organization list if it doesn't appear up to date.
Click your `User Profile` in the top left, then hover over `Settings` and select `Account`.
Scroll down to the *Organizations & Teams* section.
Click the `Refresh` button (circular arrow icon) to manually sync your organization list with the latest information.
Getting Help with Organizations
Access troubleshooting resources for organization-related issues.
Click your `User Profile` in the top left, then hover over `Settings` and select `Account`.
Scroll down to the *Organizations & Teams* section.
Click the `Get Help` button (question mark icon) to open the [Organizations & Teams troubleshooting page](/products/organizations-and-teams/troubleshooting), which provides solutions for common organization access issues and authentication problems.
Learn how to create organizations, invite team members, manage team settings, and collaborate effectively with your team.
Personal Subscriptions
Manage your Pieces Pro subscription, view your plan details, update payment methods, and access billing information. Your subscription status, renewal dates, and payment history are all accessible from this section.
Viewing Your Subscriptions
See all of your active and canceled subscriptions, including plan types, status, and renewal information.
Click your `User Profile` in the top left, then hover over `Settings` and select `Account`.
Scroll down to the *Personal Subscription(s)* section to view all of your subscription plans.
Each subscription shows:
* **Plan name**: The type of subscription (e.g., Pieces Pro Plan Yearly, Pieces Pro Plan Monthly)
* **Status**: Active (green badge) or Canceled (red badge)
* **Renewal information**: Auto-renewal date for active plans or cancellation date for canceled plans
Managing Your Subscription
Access the billing dashboard to update payment methods, view invoices, and manage your subscription settings.
Click your `User Profile` in the top left, then hover over `Settings` and select `Account`.
Scroll down to the *Personal Subscription(s)* section.
Click the `Manage` button (document with checkmark icon) next to your subscription to open the [billing dashboard](/products/paid-plans/manage-subscription).
In the [billing dashboard](/products/paid-plans/manage-subscription), you can:
* Update your payment method
* View and download invoices
* Change your subscription plan
* Cancel your subscription
Refreshing Subscription Status
Manually refresh your subscription status if it doesn't appear up to date.
Click your `User Profile` in the top left, then hover over `Settings` and select `Account`.
Scroll down to the *Personal Subscription(s)* section.
Click the `Refresh` button (circular arrow icon) to manually sync your subscription status with the latest information from the billing system.
Getting Help with Subscriptions
Access support resources for subscription and billing questions.
Click your `User Profile` in the top left, then hover over `Settings` and select `Account`.
Scroll down to the *Personal Subscription(s)* section.
Click the `Get Help` button (question mark icon) to access support resources for subscription and billing questions, including payment issues, plan changes, and account management.
Personal Cloud
Configure cloud synchronization, backups, and your personal domain. This keeps your materials and workflow history available wherever you work. Pieces can run entirely offline, but connecting to Pieces Cloud enables real-time syncing and access across devices.
Cloud Status
View your cloud connection status and when it was last updated. The status indicator shows whether your Personal Cloud is connected or disconnected, along with a timestamp of the last update.
Click your `User Profile` in the top left, then hover over `Settings` and select `Account`.
Scroll down to the *Personal Cloud* section to view your connection status.
You'll see your connection status:
* **Connected**: Shows "Status: Connected" with a green dot, along with "Last updated [time]"
* **Disconnected**: Shows "Status: Disconnected" with a gray dot
Connecting to Personal Cloud
Connect to your Personal Cloud to enable cloud synchronization, backups, and sharing features. When you connect, Pieces will automatically sync if you already have a cloud account, or create a new cloud for you.
Click your `User Profile` in the top left, then hover over `Settings` and select `Account`.
Scroll down to the *Personal Cloud* section.
When your cloud is disconnected, click the `Cloud Icon` to the right of the status indicator to connect to your Personal Cloud.
Pieces will automatically sync your data if you already have a cloud account, or create a new cloud account for you. Once connected, your status will update to "Connected" and you'll have access to all cloud features.
Any material saved in *Pieces Drive* or marked as a snippet is backed up. There are *no storage limits* on cloud-synced data.
Disconnecting Personal Cloud
Disconnect from your Personal Cloud at any time to disable cloud synchronization and features. You can reconnect later if needed.
Click your `User Profile` in the top left, then hover over `Settings` and select `Account`.
Scroll down to the *Personal Cloud* section.
When your cloud is connected, click the `Disconnect Cloud Icon` (cloud with diagonal line) to disconnect from your Personal Cloud.
Confirm the disconnection when prompted. Once disconnected, cloud features will be disabled and your status will show as "Disconnected".
Before disconnecting, keep in mind that several features require connectivity to your Personal Cloud:
- Sharing (beta): The ability to generate and share links for saved materials from Pieces Drive
- Cloud ML: Cloud-based enrichment of metadata for saved materials
- Cloud Backup: The automatic synchronization of your data to Pieces Cloud
- Cloud Integrations: Your Pieces Cloud which controls your personal subdomain and other integrations
Personal Domain
Customize your personal subdomain to create a unique URL for sharing your materials. Your personal domain is used when generating shareable links for your saved materials.
When you're connected to Pieces Cloud, you're assigned a personal subdomain (e.g., yourname.pieces.cloud) for sharing snippets. This subdomain isn't publicly browsable like a profile page—instead, it's prepended to any URLs you generate when sharing saved materials.
Click your `User Profile` in the top left, then hover over `Settings` and select `Account`.
Scroll down to the *Personal Cloud* section.
Find the *Personal Cloud Domain* section, which shows your current domain status and the text input field.
In the text input field, enter the custom text you want to use before `.pieces.cloud`. For example, entering "nolanworksat" will create `nolanworksat.pieces.cloud`.
Your domain will update automatically. The section will show "Your domain [your_custom_url].pieces.cloud is running" when active.
Backup & Restore Data
Create manual backups of your data for long-term storage and recovery. These backups are stored in your personal Pieces cloud and can be restored or deleted at any time.
Click your `User Profile` in the top left, then hover over `Settings` and select `Account`.
Scroll down to the *Personal Cloud* section.
In the *Backup & Restore Data* section, click the `Restore Icon` (Circular Arrow Icon) to open the *Backup & Restore Data* modal.
Creating a Backup
Create a manual backup snapshot of your data. Backups are stored in your personal Pieces cloud and include all your saved materials, settings, and preferences.
Click your `User Profile` in the top left, hover over `Settings`, select `Account`, then scroll to the *Personal Cloud* section and click the `Restore Icon` in the *Backup & Restore Data* section.
In the modal, find the *Create Backup* section, which shows "Backups will be stored in your personal Pieces cloud".
Click the `Cloud Icon with Upward Arrow` to create a new backup. The backup will be created and uploaded to your personal Pieces cloud.
Backup Contents
A Pieces backup contains the following data:
| Data Type |
Summary |
| Snippets |
All saved code snippets and related metadata. |
| Pieces Drive Files |
Any files stored in Pieces Drive. |
| User Preferences |
Theme, UI settings, and personalization options. |
| Conversational Search Data |
Recent chat history and AI context for Conversational Search. |
| Search & Tagging Data |
User-defined tags and previous searches for quick retrieval. |
| Account Connections |
Linked GitHub, Google, or Microsoft accounts (without passwords). |
Backups *do not include* Pieces Cloud data that is already synced or external files which are not explicitly stored in Pieces Drive.
Viewing Your Backups
See all of your available backups with details about when they were created, their size, the device they were created on, and the PiecesOS version at the time of backup.
Click your `User Profile` in the top left, hover over `Settings`, select `Account`, then scroll to the *Personal Cloud* section and click the `Restore Icon` in the *Backup & Restore Data* section.
Scroll down to the *Backups* section, which shows the total number of backups and lists each backup with:
* **Date and time**: When the backup was created (e.g., "Mon, Dec 8, 2025 9:41 AM")
* **Size**: The backup file size (e.g., "342.85 MB")
* **Device**: The device name where the backup was created (e.g., "Judsons MacBook Air")
* **OS Version**: The PiecesOS version at the time of backup (e.g., "PiecesOS v12.3.3")
Restoring a Backup
Restore a previous backup to recover all saved materials, settings, and preferences. This will return Pieces Drive and the Pieces Desktop App to the state captured in that backup.
Click your `User Profile` in the top left, hover over `Settings`, select `Account`, then scroll to the *Personal Cloud* section and click the `Restore Icon` in the *Backup & Restore Data* section.
In the *Backups* section, find the backup you want to restore from the list.
Click the `Restore Icon` (Refresh/Circular Arrow Icon) on the right side of the backup entry to restore that backup.
Confirm the restoration when prompted. All saved materials, settings, and preferences will be restored to the state captured in that backup.
Deleting a Backup
Remove old backups that you no longer need. Deleted backups cannot be restored—this is a permanent deletion.
Click your `User Profile` in the top left, hover over `Settings`, select `Account`, then scroll to the *Personal Cloud* section and click the `Restore Icon` in the *Backup & Restore Data* section.
In the *Backups* section, find the backup you want to delete from the list.
Click the `Trash Icon` on the right side of the backup entry to delete that backup.
Confirm the deletion when prompted. The backup will be permanently removed and cannot be restored.
Cloud Syncing
Cloud syncing is optional—you can use Pieces entirely offline if you prefer. Once connected, syncing happens automatically in real time, keeping your data synchronized across all your devices. The only way to disable syncing is by disconnecting from Pieces Cloud.
When connected, your data is automatically synchronized in real time across all devices where you're signed in. This includes snippets, Pieces Drive files, settings, and workflow history.
Privacy
Configure telemetry and diagnostics settings to help improve Pieces. Share anonymous telemetry and crash data to help the Pieces team build better tools across macOS, Linux, and Windows.
Telemetry & Diagnostics
Enable or disable anonymous telemetry and crash data collection. Building next-generation tools across macOS, Linux, and Windows is hard! Share anonymous telemetry and crash data to help improve Pieces.
Click your `User Profile` in the top left, then hover over `Settings` and select `Account`.
Scroll down to the *Privacy* section.
Find the "Telemetry & Diagnostics" option with a checkbox.
Check or uncheck the `Checkbox` next to "Telemetry & Diagnostics" to enable or disable anonymous telemetry and crash data collection.
Participating in telemetry helps Pieces evolve more effectively, but you can opt out for greater privacy. Read more about compliance, privacy, and security [here](/products/privacy-security-your-data), and as always feel free to reach out to our team on [Discord](https://discord.gg/getpieces), [GitHub](https://github.com/pieces-app), or at support@pieces.app.
Next Steps
Now that you understand how to manage your account, learn about Long-Term Memory to configure memory preferences, or explore Choose a Model to switch between model families and modes.