Pieces MCP + Claude Desktop & Code | Setup Guide
Discover different ways to configure the Pieces MCP to provide your workflow context to Claude Desktop and Claude Code, allowing you to work smarter.
Get Started
Integrating the Pieces MCP with Claude Desktop or Claude Code is a powerful way to bring your workflow context directly into your AI assistant.
With this integration, you'll have a Claude agent that knows more about your projects than just the files you copy and paste.
You can ask questions about prior work, like "What decision did I make in last week's sprint review?" and instantly reuse that context without searching through notes or commits.
Learn how to integrate the Pieces MCP into Claude Desktop or Claude Code by following the steps below.
Prerequisites
There are two main things you need to do to connect Pieces with Claude as an MCP:
If you don't have [PiecesOS](/products/core-dependencies/pieces-os/manual-installation), you can download it with the [Pieces Desktop App](/products/desktop/download) or get it separately [here](https://pieces.app/download).
Installing PiecesOS & Configuring Permissions
Follow the instructions below for a detailed guide on setting up and configuring PiecesOS to correctly pass captured workflow context to the Pieces MCP server.
Setting up Pieces MCP for Claude Desktop
There are three methods to set up the Pieces MCP for Claude Desktop: use the one-click setup in Pieces Desktop, configure manually, or use the Pieces CLI.
One-Click Setup via Pieces Desktop (Recommended)
The fastest way to connect Pieces MCP to Claude Desktop is through the MCP Connections feature in Pieces Desktop.
Method 1: Manual Configuration (Direct MCP Command)
This method involves editing Claude Desktop’s MCP configuration file to point directly to a CLI command that starts the Pieces MCP server.

In your terminal, run the following commands:

```powershell
py -m pip install --upgrade pip
py -m pip install pieces-cli
```

Next, confirm that the installation was successful:

```powershell
pieces --version
```
For example:

1. **Windows →** `C:\Users\<YourUser>\AppData\Local\Programs\Python\Python3XX\Scripts\pieces`

2. **macOS →** `usr/local/bin/pieces`

3. **Linux →** `home/<YourUserNameHere>/.local/bin/pieces`
Depending on your platform, this might be:

1. **Windows →** `C:\Users\<YourUser>\AppData\Roaming\Claude\claude_desktop_config.json`

2. **macOS →** `~/Library/Application Support/Claude/claude_desktop_config.json`

3. **Linux →** `~/.config/Claude/claude_desktop_config.json`

If the file exists → open it in a text editor.\
If it doesn’t exist → create it manually in that directory.
```json
{
  "mcpServers": {
    "pieces": {
      "command": "/Users/<YourUser>/venv/bin/pieces",
      "args": [
        "--ignore-onboarding",
        "mcp",
        "start"
      ]
    }
  }
}
```

**Path examples by OS:**
* **macOS/Linux** — `/Users/<YourUser>/venv/bin/pieces` or `~/.local/bin/pieces`
* **Windows** — `C:\Users\<YourUser>\AppData\Local\Programs\Python\Python3XX\Scripts\pieces.exe`
This utility communicates with PiecesOS and your local repository of saved workflow context.
Method 2: Using the Pieces CLI
This method uses the Pieces CLI to automatically set up and configure Pieces MCP for Claude Desktop.
```powershell
-m pip install --upgrade pip
py -m pip install pieces-cli
```
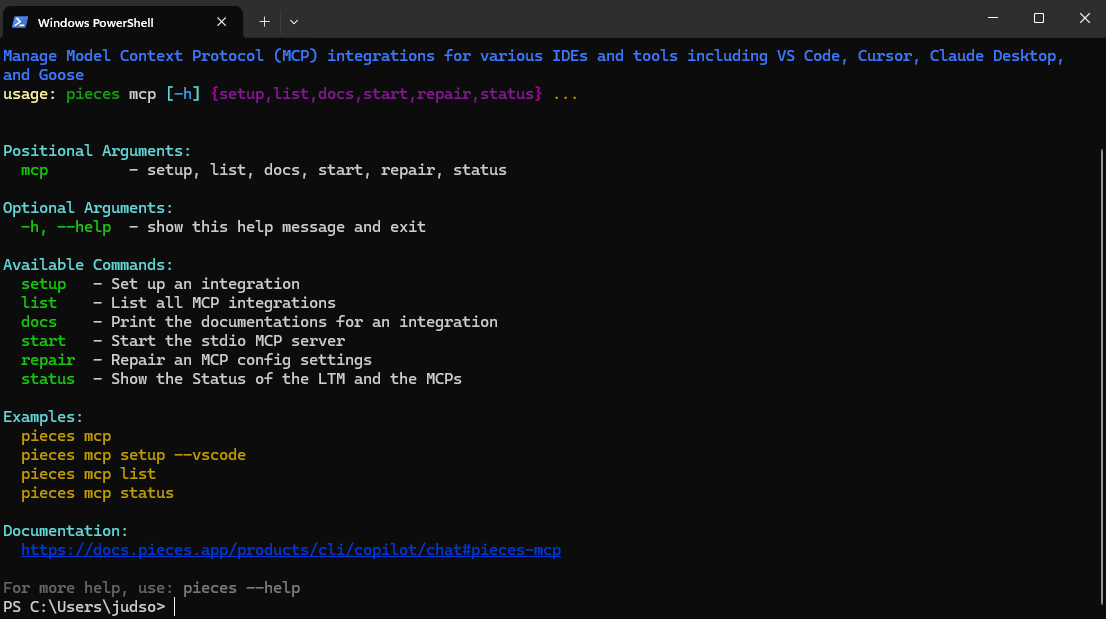
```powershell
pieces mcp setup
```

A platform selection menu appears with these options: *VS Code*, *Cursor*, *Claude Desktop*, *Windsurf*, *Claude Code*, *Raycast*, and *Warp*. Use the arrow keys to navigate, hover over *Claude Desktop* or *Claude Code*, then press `return` (macOS) or `enter` (Windows/Linux) to auto-install the MCP.
<Image src="https://storage.googleapis.com/hashnode_product_documentation_assets/mcp_documentation/pieces_mcp_claude_desktop/cli_mcp_setup_claude_desktop.png" alt="Successful Pieces MCP setup in Claude Desktop" align="center" fullwidth="true" />
Adding Pieces MCP to Claude Code
Configure Pieces MCP for Claude Code to make it available across all your projects.
```bash
claude mcp add --scope user pieces --transport http http://localhost:39300/model_context_protocol/2025-03-26/mcp
```

The `--scope user` flag makes Pieces MCP available globally across all your Claude Code projects, rather than just the current directory.
* *"What patterns did I use in my last React component?"*
* *"Show me the authentication flow I implemented yesterday."*
Using Pieces MCP Server
Once integrated, you can utilize Pieces LTM directly in Claude Desktop or Claude Code.
Start a Conversation
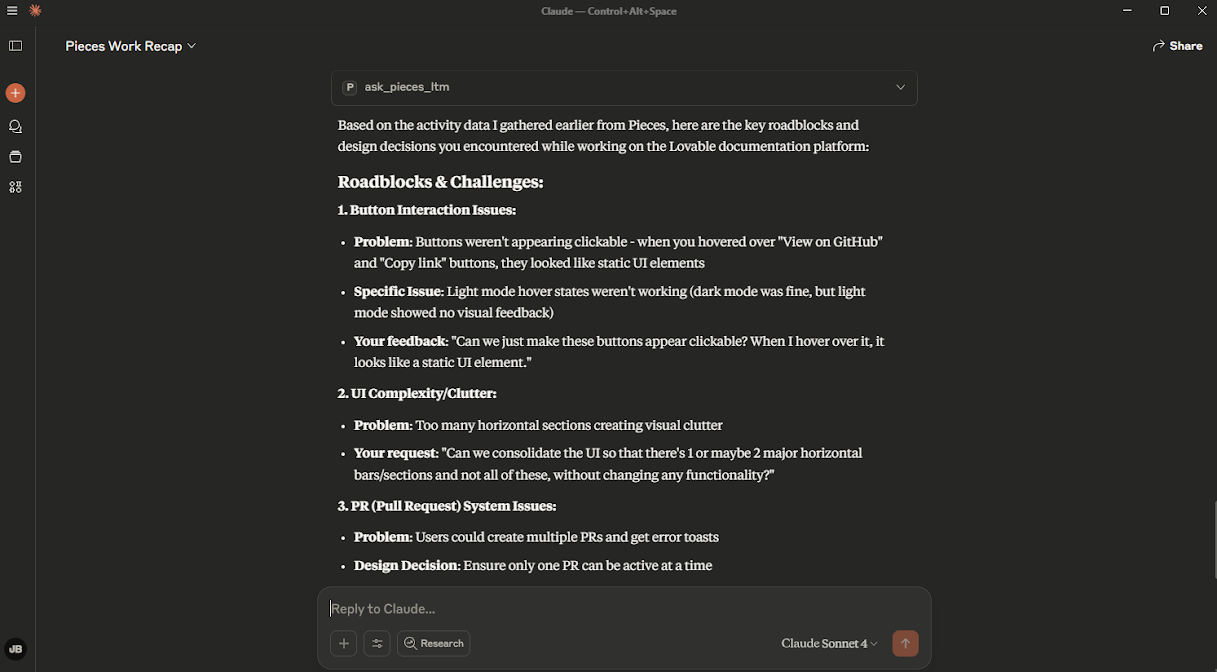
Launch a new conversation in Claude Desktop or open a project in Claude Code.Prompt with Context
Ask Claude questions about prior work or files (e.g., "What was I doing for work yesterday?").
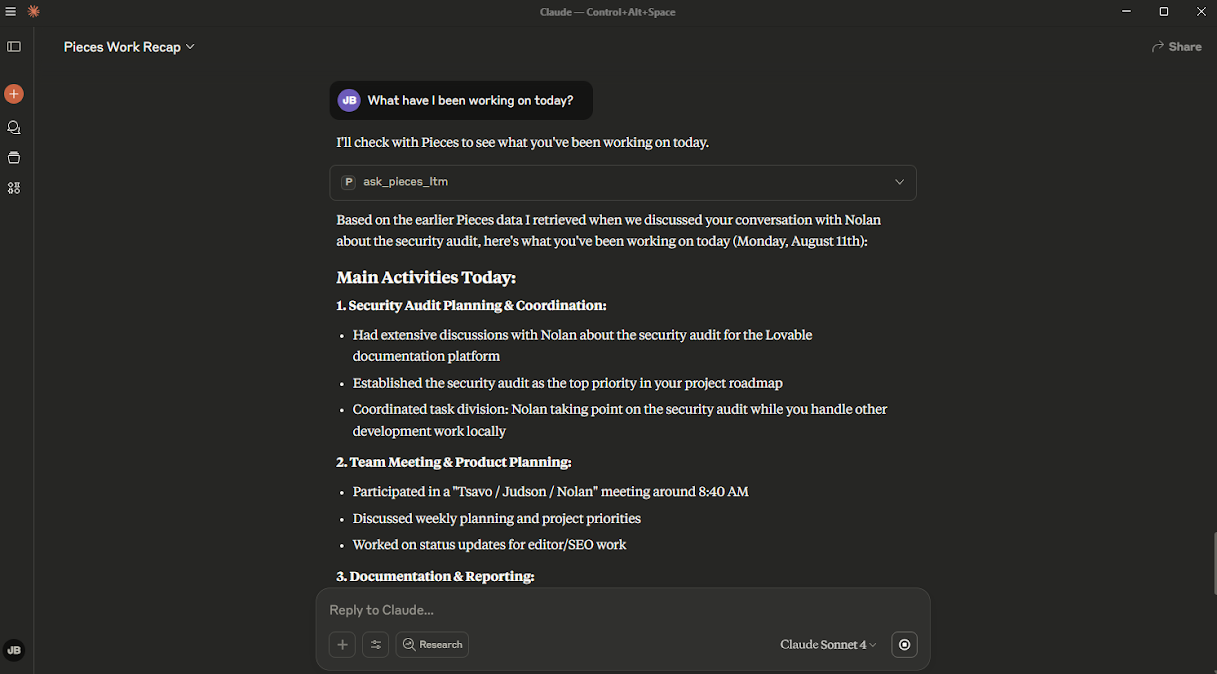
- Verify MCP Tools Are Active
If configured correctly, Claude will automatically use theask_pieces_ltmtool to pull relevant context.
Troubleshooting
If you're experiencing issues integrating Pieces MCP with Claude Desktop or Claude Code:
Verify PiecesOS Status
Ensure PiecesOS is actively running on your system.Confirm LTM Engine Activation
Long-Term Memory (LTM-2.7) must be enabled in PiecesOS.Single MCP Instance
Avoid running multiple Pieces MCP instances in different apps simultaneously.Check MCP Server Status in Claude
Use the Developer Console (Ctrl+Shift+I) to confirm connection messages.Review Configuration
If using Method 1, ensure your JSON paths are correct.
If using Method 2, rerun:pieces mcp setup
You’re now ready to enhance your Claude Desktop experience with the Pieces MCP, enabling powerful, context-aware conversations and seamless access to your workflow history.