Accessing Copilot Chat in your Terminal
There are two ways to manage your Copilot chats in the Pieces CLI.
Starting a New Copilot Chat
To quickly start a conversation with Conversational Search:
If you’re not in Pieces CLI, in your terminal, you can type `pieces ask query`, replacing `query` with your question.

<Image src="https://storage.googleapis.com/hashnode_product_documentation_assets/cli_assets/pieces_copilot/chat/ask_pieces.gif" alt="Using the ask command in Pieces CLI" align="center" fullwidth="true" />
Opening Previous Chats
To resume or explore an earlier conversation:
chats: Show all your conversations. The one highlighted in green is where new questions go by default.chat: Display the messages in your current conversation.chat <number>: Switch to conversation<number>and show its messages.
Use these flags with your chat command to manage conversations as you go:
chat --new,chat -n: Create a new conversation and switch to it.chat --delete,chat -d: Delete the conversation you’re currently viewing.chat --rename [name],chat -r [name]: Rename the conversation you’re viewing. If you don’t provide[name], the assistant will suggest one.
Read more about what commands are available in the Pieces CLI.
Contextualized Chats
You can narrow Copilot’s focus by feeding it specific materials or files when you ask a question.
via Material Index
Conversational Search will load material #4 as context.

<Image src="https://storage.googleapis.com/hashnode_product_documentation_assets/cli_assets/pieces_copilot/chat/pieces_context_chat.gif" alt="Providing material context to Copilot" align="center" fullwidth="true" />
via File Path
Use a folder of specific file as context for Conversational Search by initiating the conversation at a specified path.
Conversational Search will read that file before answering.
Copilot loads material #2 and `specs.md` before generating its response.

<Image src="https://storage.googleapis.com/hashnode_product_documentation_assets/cli_assets/pieces_copilot/chat/adding_file.png" alt="Adding multiple contexts to chat query" align="center" fullwidth="true" />
Pieces MCP
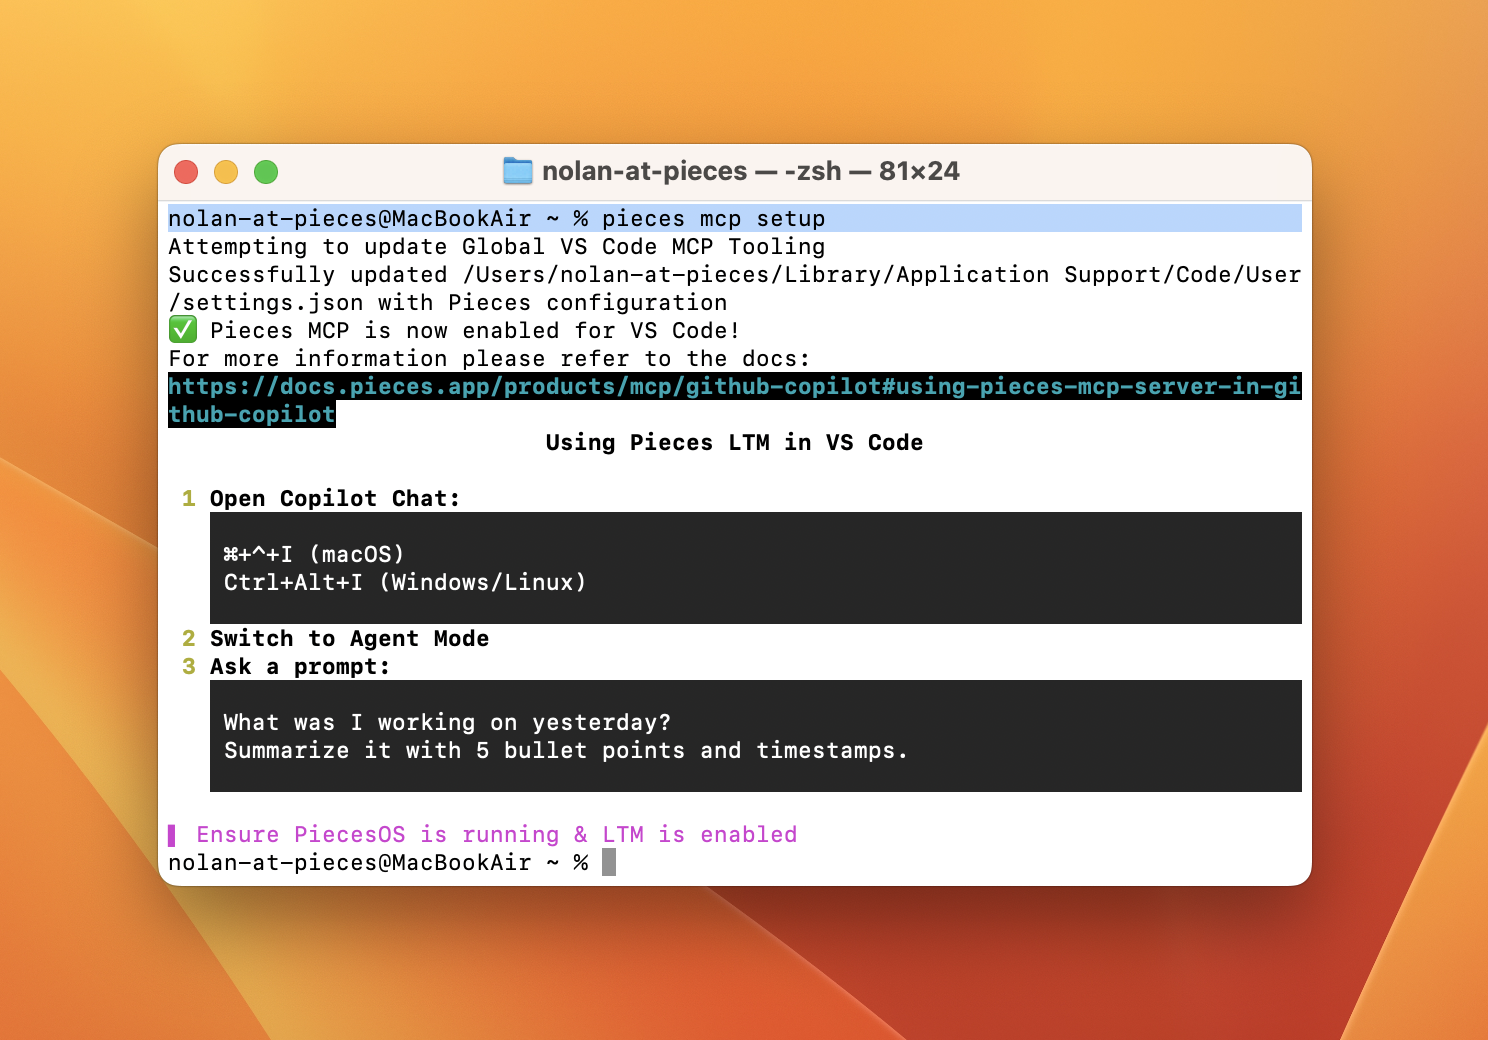
The Pieces CLI bridges the Model Context Protocol (MCP) to your development tools—no manual config editing required. Run pieces mcp setup from your terminal to get started.
Setup
Run pieces mcp setup from your terminal to open an interactive menu and automatically configure Pieces MCP for your platform.
* VS Code
* Cursor
* Claude Desktop
* Windsurf
* Claude Code
* Raycast
* Warp

<Image src="https://storage.googleapis.com/hashnode_product_documentation_assets/cli_assets/pieces_copilot/chat/selecting_mcp_option.png" alt="MCP platform selection menu" align="center" fullwidth="true" />
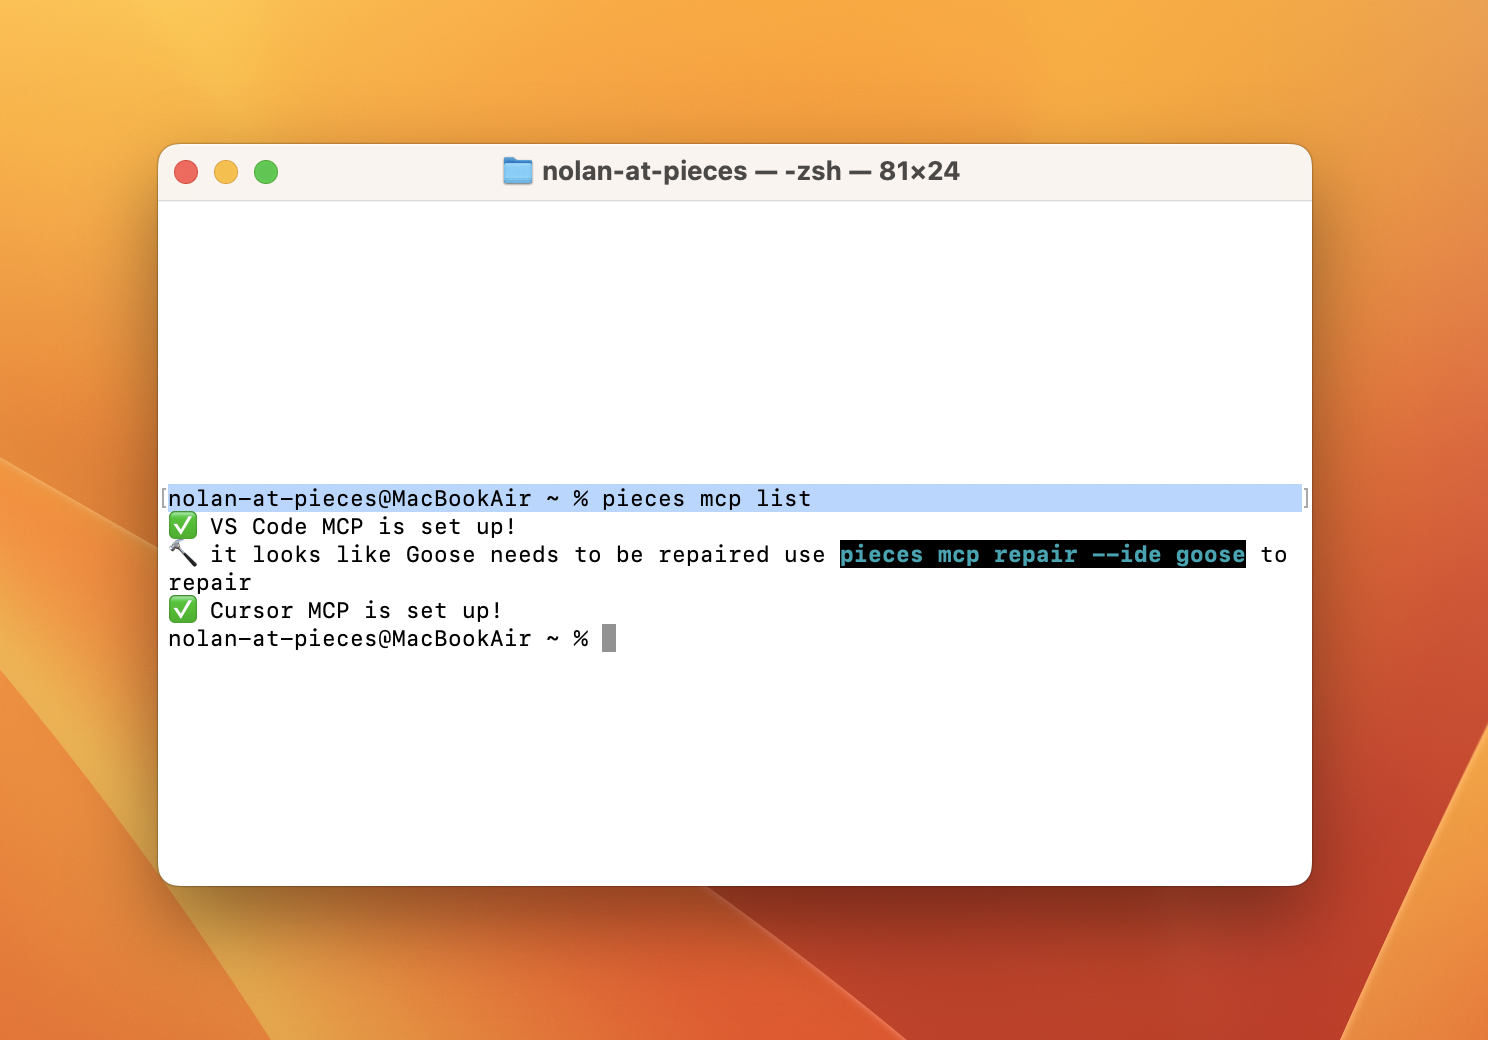
List
The mcp list command displays the current implementations of Pieces MCP on your development platforms.
The Pieces CLI supports integration with VS Code, Cursor, Claude Desktop, Windsurf, Claude Code, Raycast, Warp, GitHub Copilot, and Goose.
Docs
The mcp docs command displays all of the mcp documentation correlated with the supported development environments with the Pieces CLI and Pieces MCP.
Repair
The mcp repair command checks how the Pieces MCP is set up in the platforms supported by Pieces CLI.
If it finds any issues, it will automatically fix them and ask you to type y for yes or n for no. Then, press return (macOS) or enter (Windows/Linux) to confirm your choice.
Status
Running mcp status within the Pieces CLI will automatically check all implemented platforms to make sure the Pieces MCP implementation is running correctly.
If it finds that an implementation is broken, it will ask if you want to auto-repair the MCP server.
Type y for yes or n for no, and press return (macOS) or enter (Windows/Linux) to confirm your choice.