Get Started with Pieces CLI | Installation & Setup
Install the Pieces CLI, verify PiecesOS is running, and run your first commands from the terminal.
Pieces CLI Prerequisites
Before installation, you’ll need:
PiecesOS: The power engine behind the Pieces CLI and the rest of the Pieces Suite. Learn more about PiecesOS.
Python 3.xx: Python is required to be installed on your development machine.
We also suggest using the Pieces Desktop App for better functionality.
Sign in Required
Pieces requires all users to sign in before using any Pieces products, including MCP integrations and the CLI. You'll be prompted to authenticate if you haven't already. For help, see our sign-in guide.
Installing the Pieces CLI
Follow the instructions below to install the Pieces CLI and any required dependencies.
<Image src="https://storage.googleapis.com/hashnode_product_documentation_assets/cli_assets/get_started/python_download.png" alt="Python download page" align="center" fullwidth="true" />

After downloading the Python version 3.xx, you will be guided through the installation process. Follow their steps until Python is installed.

<Callout type="tip">
  Make sure to allow Python to be added to your environment variables, so it’s executable via terminal.
</Callout>
<Tabs>
  <Tab label="Windows">
    Install the Pieces CLI on Windows using Python’s launcher:

    ```bash
    py -m pip install pieces-cli
    ```
  </Tab>
  <Tab label="macOS">
    Install with Homebrew on macOS:

    ```bash
    brew install pieces-cli
    ```
  </Tab>
  <Tab label="Linux">
    Install with pip3 on Linux:

    ```bash
    pip3 install pieces-cli
    ```
  </Tab>
</Tabs>
<Callout type="alert">
  If you receive **'pieces' is not recognized as an internal or external command,** you can run pieces with `py -m pieces $command`.
</Callout>
Setting Up PiecesOS
To use the Pieces CLI, you must install PiecesOS on your working environment.
Click the download buttons or follow the set-up instructions below for your operating system:
Updating
Follow the steps below to update the Pieces CLI.
<Tabs>
  <Tab label="Windows">
    Update to the latest Pieces CLI on Windows:

    ```bash
    py -m pip install pieces-cli -U
    ```
  </Tab>
  <Tab label="macOS">
    Upgrade with Homebrew on macOS:

    ```bash
    brew upgrade pieces-cli
    ```
  </Tab>
  <Tab label="Linux">
    Update with pip3 on Linux:

    ```bash
    pip3 install pieces-cli -U
    ```
  </Tab>
</Tabs>

<Image src="https://storage.googleapis.com/hashnode_product_documentation_assets/cli_assets/get_started/update_pieces_cli.png" alt="Pieces CLI update command output" align="center" fullwidth="true" />
Onboarding
The Pieces CLI offers a walkthrough to guide you through the steps of saving your first material and introduces you to the Long-Term Memory Engine (LTM-2.7), enabling you to make the most of the Pieces CLI.
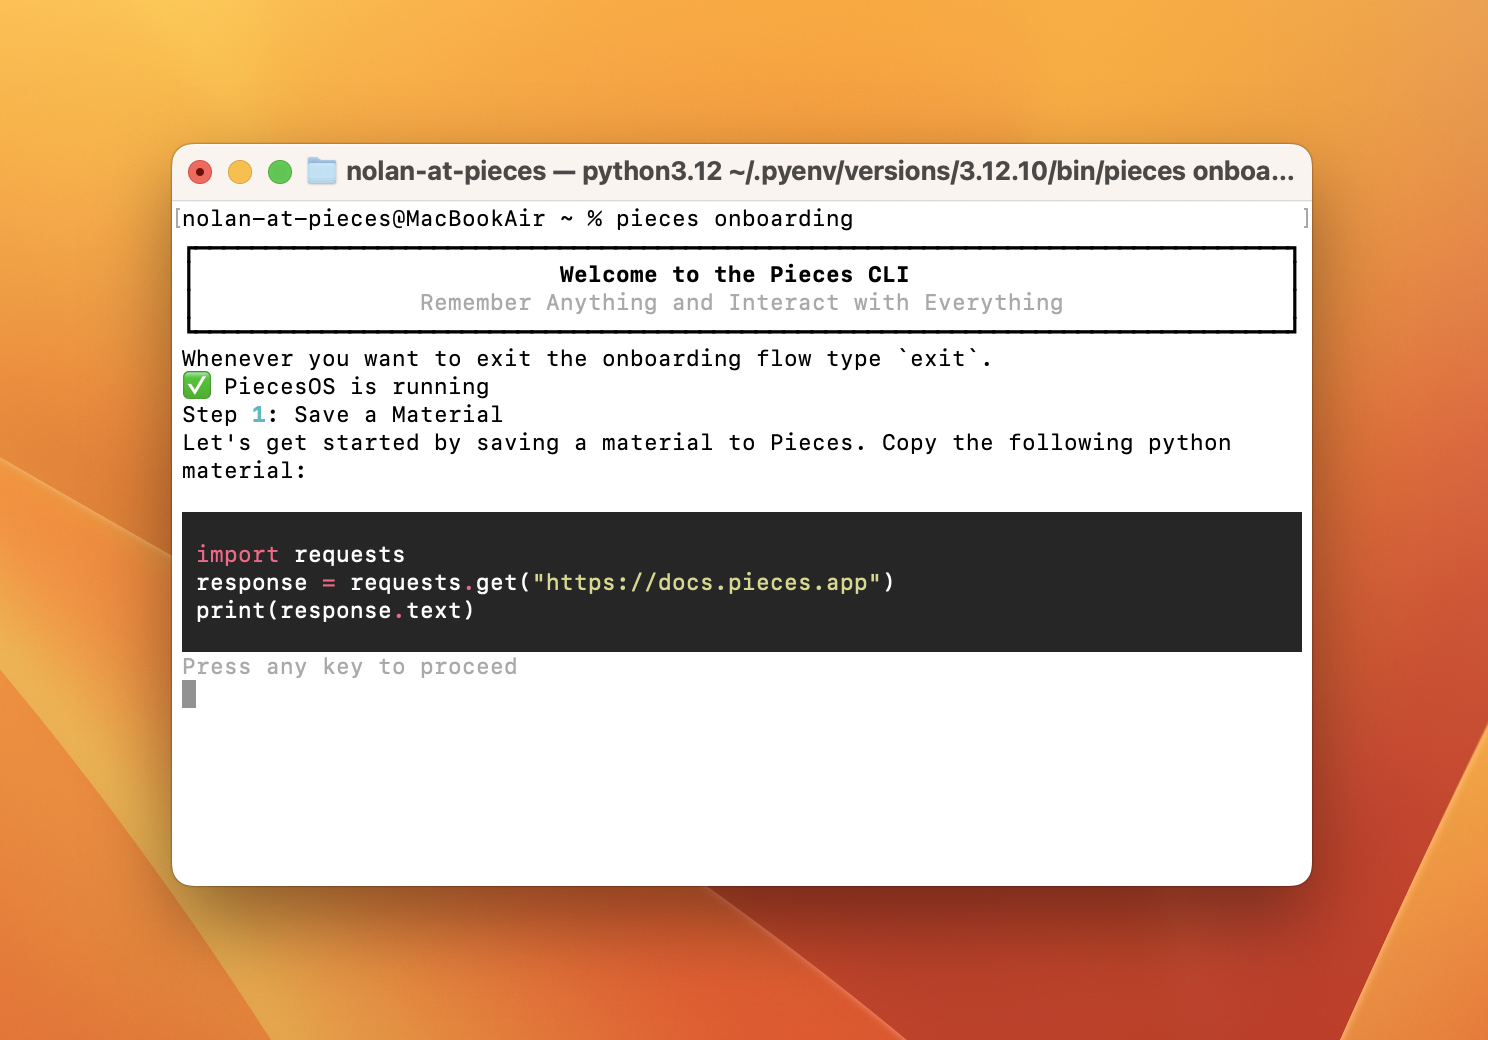
Save Your First Material
The onboarding will start by providing you with a snippet to copy to your clipboard. Highlight the code and press ⌘+c (macOS) or ctrl+c (Windows/Linux).
After copying the snippet, you can select any key on your keyboard to proceed.
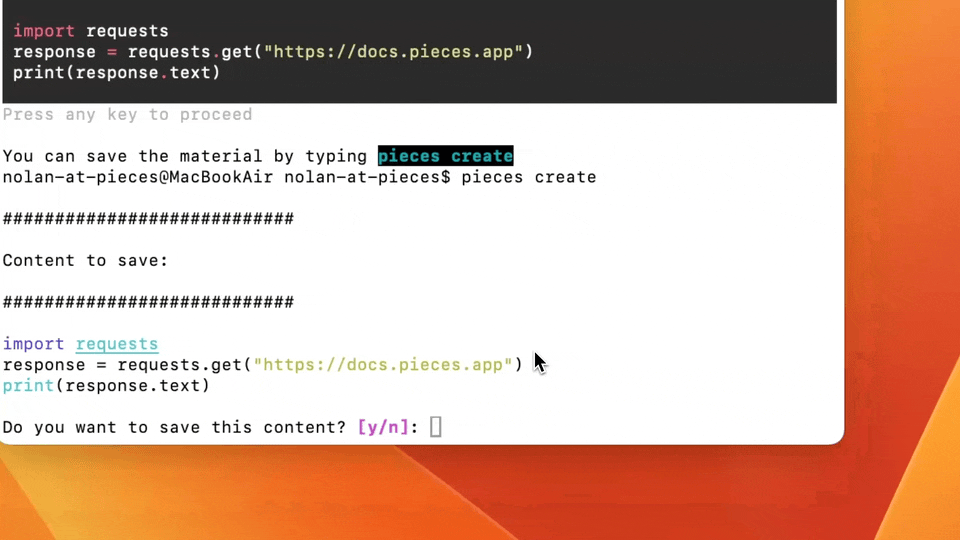
After pressing any key, Pieces will prompt you to type pieces create into your terminal. With the snippet still copied, enter pieces create, and Pieces will ask if you want to save the snippet.
Type y and press return(macOS) or enter(Windows/Linux) to confirm to save the snippet to your Pieces Drive.
Finding your Saved Materials
In this step, you'll learn how to open your saved materials. Start by typing pieces list in your terminal and pressing enter.
This will display a list of all your saved materials. You can navigate through them using the arrow keys on your keyboard.
Select the material you're highlighting by pressing return(macOS) or enter(Windows/Linux).
Start a Session
After selecting a snippet, Pieces CLI will boot you out to the terminal to prompt you to start a new session.
Typing pieces run will open a new session, allowing you to enter Pieces commands without prefixing with pieces.
After the session, you can type exit and press return(macOS) or enter(Windows/Linux) to return to the onboarding.
Chat with the Copilot
This section will walk you through how to ask Conversational Search its first question. You can begin in your terminal by typing pieces ask 'How to print I love Pieces CLI in Python and Java' and pressing return(macOS) or enter(Windows/Linux).
After typing your question and running the command, Conversational Search will quickly generate and display the best response for your query.
It will then prompt you to do it with the Pieces CLI running by typing pieces run entering the command and then entering ask $question, $question being the question you’d like to ask Conversational Search.
More Resources
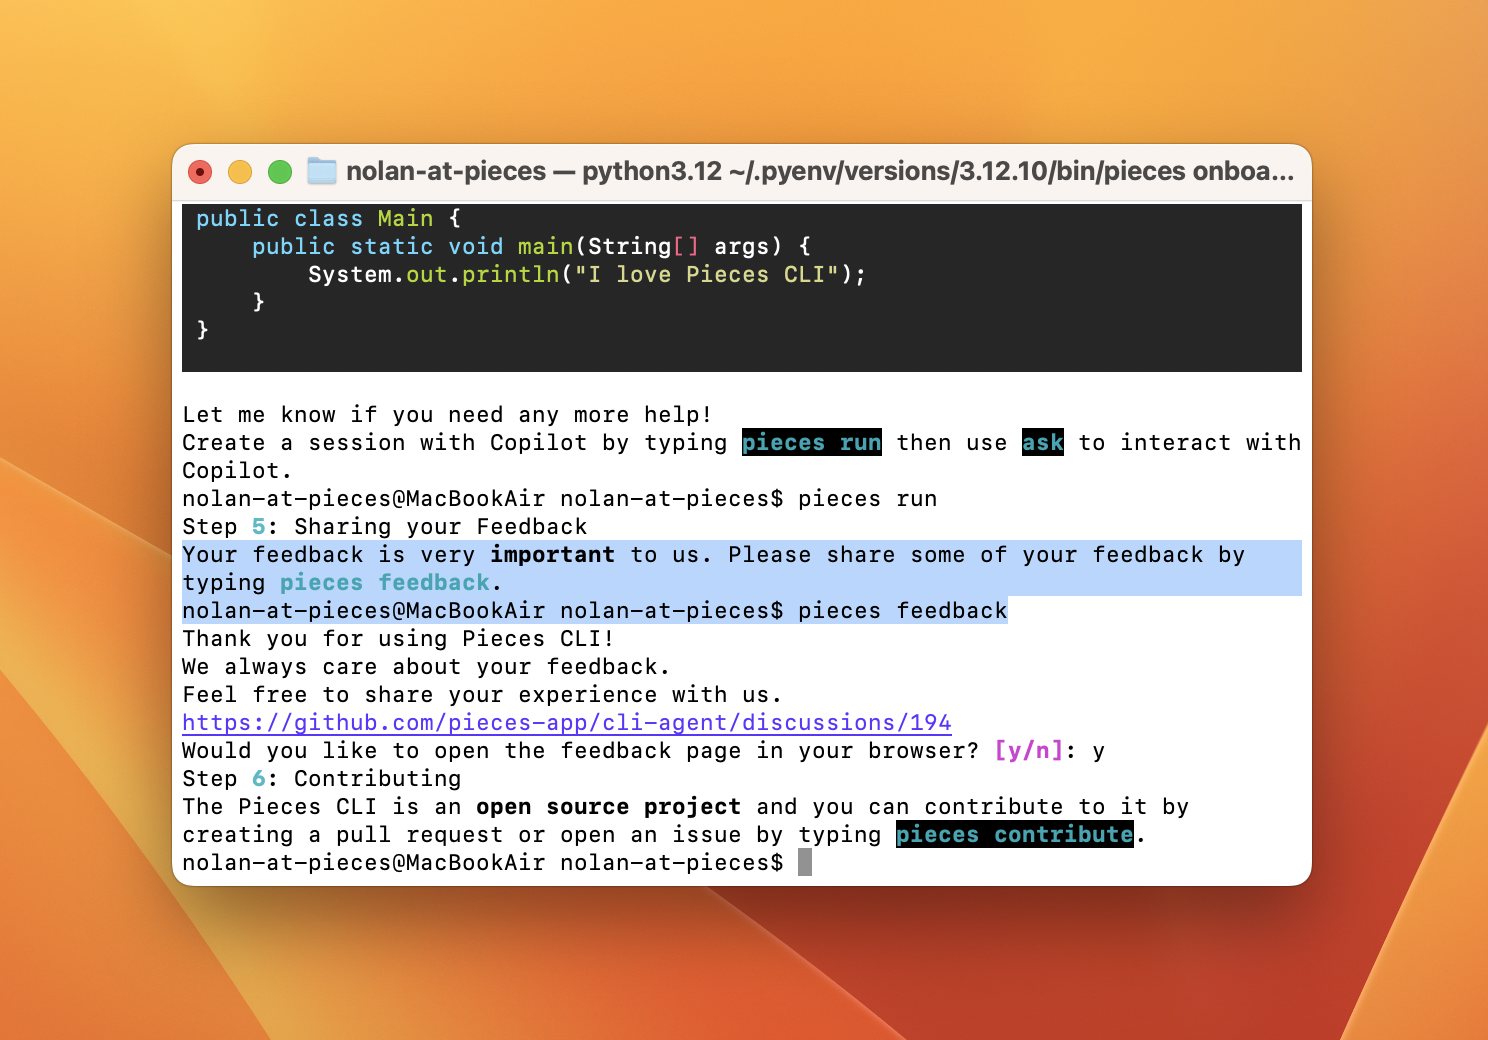
Your feedback is vital to us. This onboarding step will prompt you to enter pieces feedback where you can optionally open the GitHub discussion board related to Pieces CLI to leave helpful feedback.
If you enter y it will open the GitHub discussion board in a new tab in your browser, otherwise it will skip this step.
After completing the feedback, Pieces will prompt you to type pieces contribute and then ask if you’d like to open the source code for Pieces CLI on GitHub to improve it. You can optionally say yes by entering y; otherwise, enter n.
Uninstalling
Follow the steps below to uninstall the Pieces CLI.
If you also want to uninstall PiecesOS, follow these steps.
<Tabs>
  <Tab label="Windows">
    Uninstall on Windows:

    ```bash
    py -m pip uninstall pieces-cli
    ```
  </Tab>
  <Tab label="macOS">
    Uninstall with Homebrew on macOS:

    ```bash
    brew uninstall pieces-cli
    ```
  </Tab>
  <Tab label="Linux">
    Uninstall with pip3 on Linux:

    ```bash
    pip3 uninstall pieces-cli
    ```
  </Tab>
</Tabs>

<Image src="https://storage.googleapis.com/hashnode_product_documentation_assets/cli_assets/get_started/pip_uninstall.png" alt="Pip uninstall command output" align="center" fullwidth="true" />