Recommended Installation Method
Click the buttons below to download Pieces for your macOS device.
Install the PKG
Once you’ve downloaded the correct .pkg file, it’s time to run the installer.
System Requirements
There are (2) requirements for installing Pieces on your macOS device:
Compatible OS Version—macOS 13.0 (Ventura) or higher
Compatible installer for your device’s architecture—Apple Silicon (ARM) or Intel
Click here for a quick guide on determining your OS type, and here for how to check your device’s CPU architecture.
| Component | Minimum | Recommended | Notes |
|---|---|---|---|
| CPU | Any modern CPU | Multi-core CPU | Avoid dual-core processors—aim for at least a 4-core CPU. |
| RAM (Local Mode) | 8 GB total system RAM with 2 GB free | 16 GB total system RAM or more | Applies when PiecesOS is running locally. |
| RAM (Cloud Mode) | 8 GB total system RAM with 1 GB free | 16 GB total system RAM or more | Applies when PiecesOS is running in cloud mode. |
| Disk Space | 2 GB minimum (1 GB for PiecesOS + 0.5–1 GB for data), with at least 4 GB free | 8 GB with at least 6 GB free or more | Ensure additional free space for data storage and future growth. |
Alternative Installations
If you cannot use the .pkg installer for any reason, you can install PiecesOS and the Pieces Desktop App using standalone .dmg files or by using Homebrew through your Mac’s terminal.
via DMG (Apple Silicon / M-Series / ARM)
Install the Pieces Desktop App in order by clicking the download card below for your ARM device. PiecesOS will be installed as a core dependency with Pieces Desktop.
macOS 13.0 (Ventura) or higher required.
via DMG (Intel)
Install the Pieces Desktop App in order by clicking the download card below for your Intel device. PiecesOS will be installed as a core dependency with Pieces Desktop.
macOS 13.0 (Ventura) or higher required.
Install the DMG
After downloading the correct .dmg file, it’s time to install the Pieces Desktop App.
Install Using Homebrew
Alternatively, you may opt to install Pieces via Homebrew in your terminal.
To do so:
Ensure Homebrew is installed on your system.
Copy and run the command below:
brew install --cask pieces
This command installs both the Pieces Desktop App and PiecesOS cask. If prompted, enter your administrator password.
- Wait for installation to complete—Homebrew will download and install the necessary files.
Once it's done, you'll see a message indicating successful installation.
Post-Installation Tips
Read the documentation below for some tips and information to make sure you’re up and running with the latest version(s) of PiecesOS and the Pieces Desktop App, as well as steps to uninstall Pieces software from your Apple device.
Updating
The Pieces Desktop App automatically downloads and installs new updates.
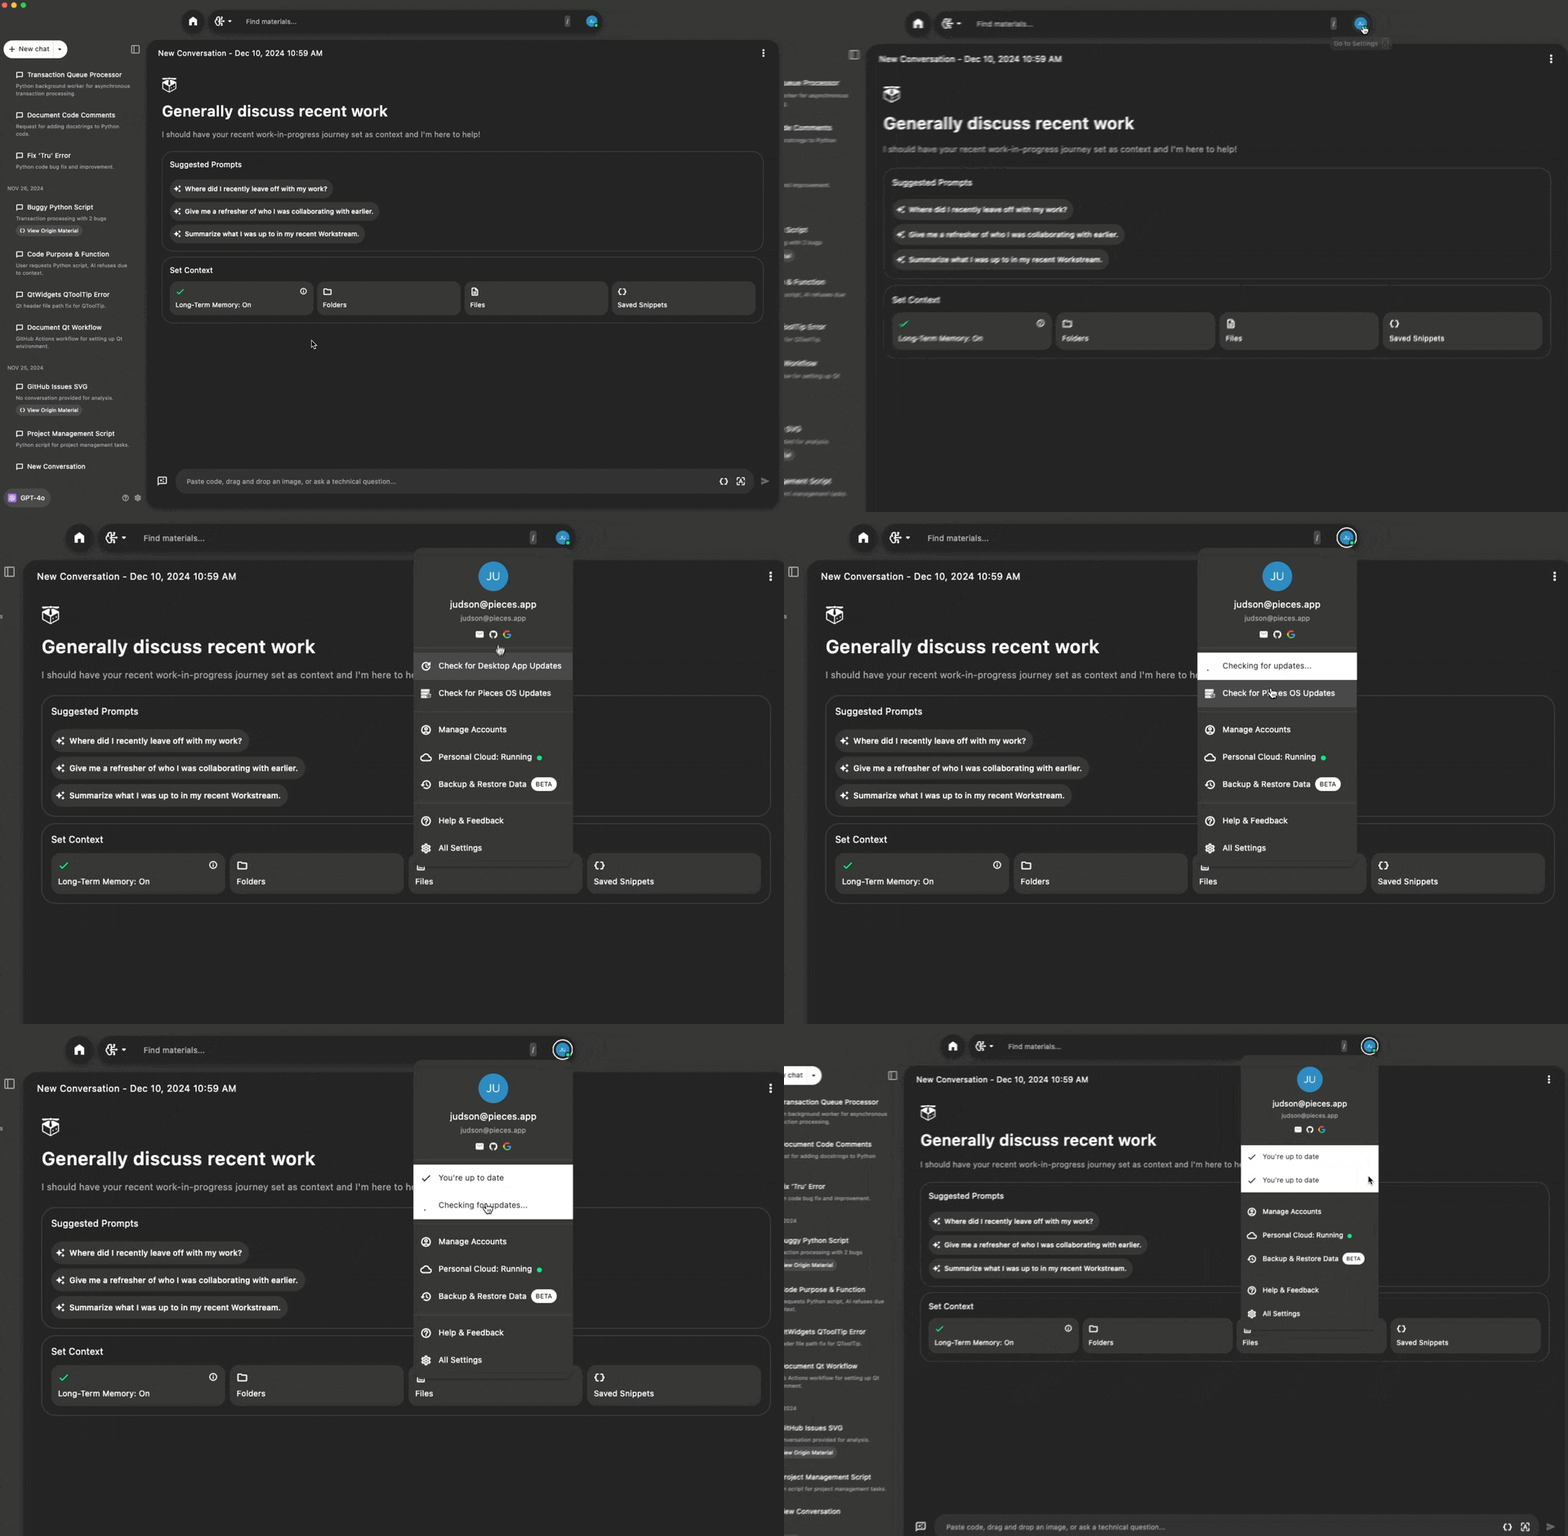
You can also manually check for updates to PiecesOS and the Pieces Desktop App by hovering over your username in the top left, then hovering over Update and selecting either Check for Desktop App Updates or Check for PiecesOS Updates.

Uninstalling
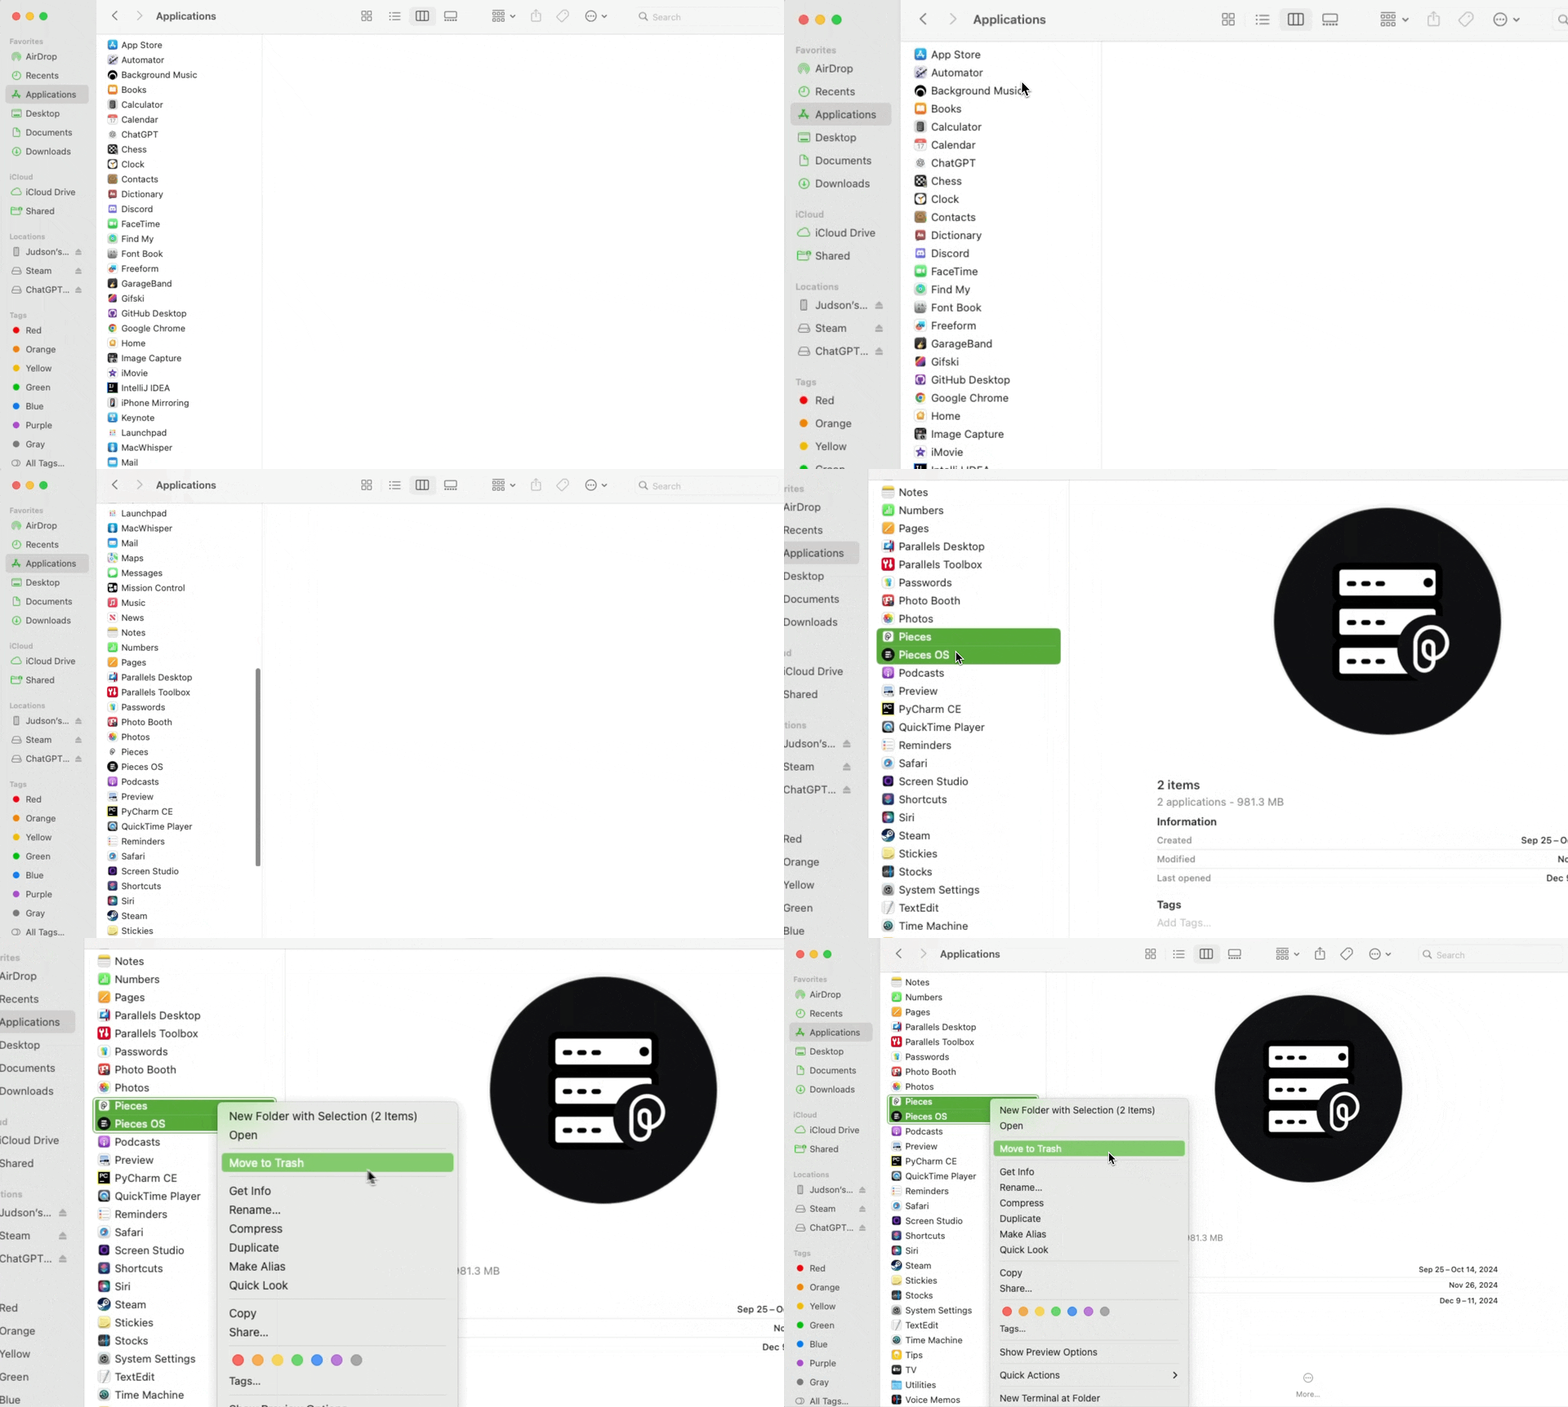
On your macOS device, navigate to Finder, then select Applications.
Scroll or search until you find both Pieces and PiecesOS. Right-click on these two applications and select Move to Trash.

Additional Resources
Click here for additional documentation on troubleshooting or reach out to support.